# 项目功能
# 获取用户信息列表
# 获取数据流程
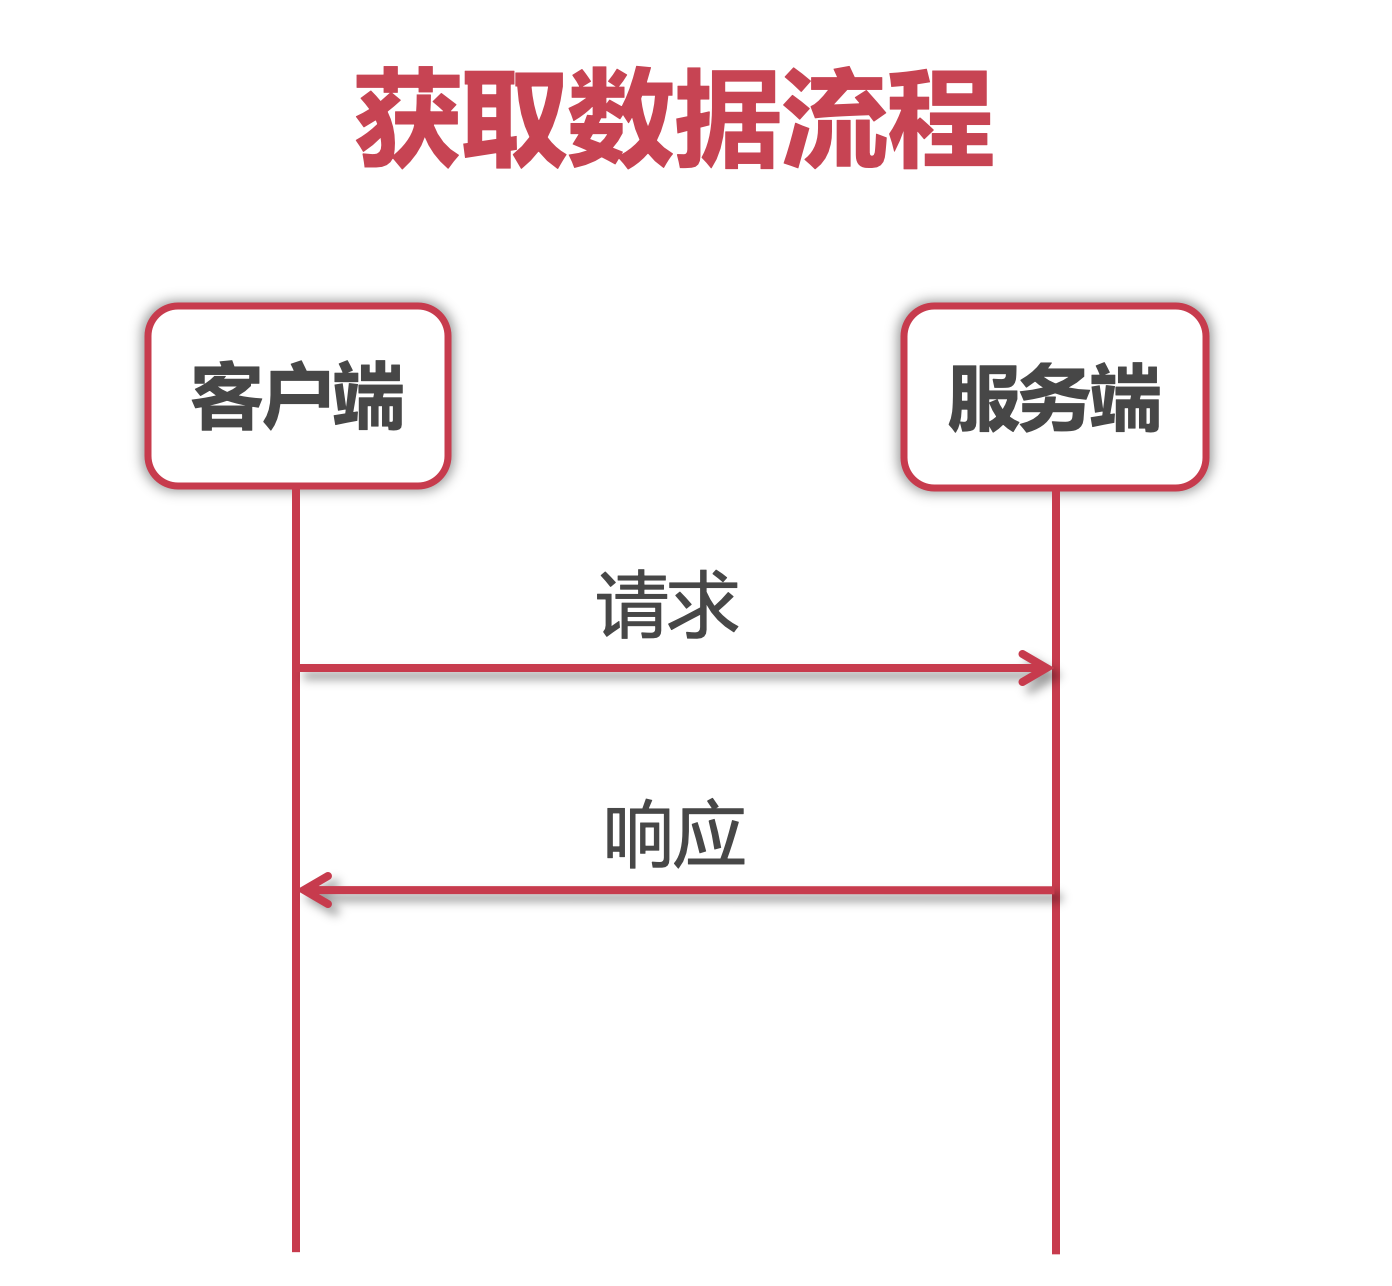
在views文件夹中创建User.vue文件。
安装axios
npm i axios --save
<template>
  <div>
    <div>用户信息</div>
    <ul>
      <li v-for="(item, index) in userList" :key="index">{{item.name}}</li>
    </ul>
  </div>
</template>

<script>
// 模块化
import axios from 'axios'
export default {
  data () {
    return {
      userList: []
    }
  },
  // Promise方式实现
  /*   created () {
      axios
        .get('http://jsonplaceholder.typicode.com/users')
        .then(res => {
          console.log(res)
          this.userList = res.data
        })
        .catch(err => {
          console.log(err)
        })
    } */

  // async/await方式实现
  async created () {
    // 解构赋值
    const { data } = await axios.get('http://jsonplaceholder.typicode.com/users')
    this.userList = data
  }
}
</script>

<style>
li {
    list-style: none;
}
ul{
    padding: 0;
}
</style>
在router/index.js中配置路由。
import User from '../views/User.vue'

const routes = [{
    path: '/',
    name: 'User',
    component: User
}]
在App.vue中配置链接。
<router-link to="/">用户列表</router-link>
# 使用Proxy代理用户信息
<template>
  <div>
    <div>用户信息</div>
    <button @click="asc">升序</button>
    <button @click="desc">降序</button>
    <button @click="reset">重置</button>
    <ul>
      <li v-for="(item, index) in userList" :key="index">{{item.name}}</li>
    </ul>
  </div>
</template>

<script>
import axios from 'axios'
export default {
  data () {
    return {
      userList: []
    }
  },
  //   created () {
  //     axios
  //       .get('http://jsonplaceholder.typicode.com/users')
  //       .then(res => {
  //         console.log(res)
  //         this.userList = res.data
  //       })
  //       .catch(err => {
  //         console.log(err)
  //       })
  //   }
  async created () {
    // 解构赋值
    const { data } = await axios.get('http://jsonplaceholder.typicode.com/users')
    // 代理
    this.proxy = new Proxy({}, {
      get (target, key) {
        if (key === 'asc') { // 升序
          return [].concat(data).sort((a, b) => a.name > b.name ? 1 : -1)
        } else if (key === 'desc') { // 降序
          return [].concat(data).sort((a, b) => b.name > a.name ? 1 : -1)
        } else {
          return data
        }
      },
      set () {
        return false
      }
    })
    this.userList = this.proxy.default
  },
  methods: {
    asc () {
      this.userList = this.proxy.asc
    },
    desc () {
      this.userList = this.proxy.desc
    },
    reset () {
      this.userList = this.proxy.default
    }
  }
}
</script>

<style>
li {
    list-style: none;
}
ul{
    padding: 0;
}
</style>
# 异步操作多张图片上传阿里云OSS
图片上传流程图:
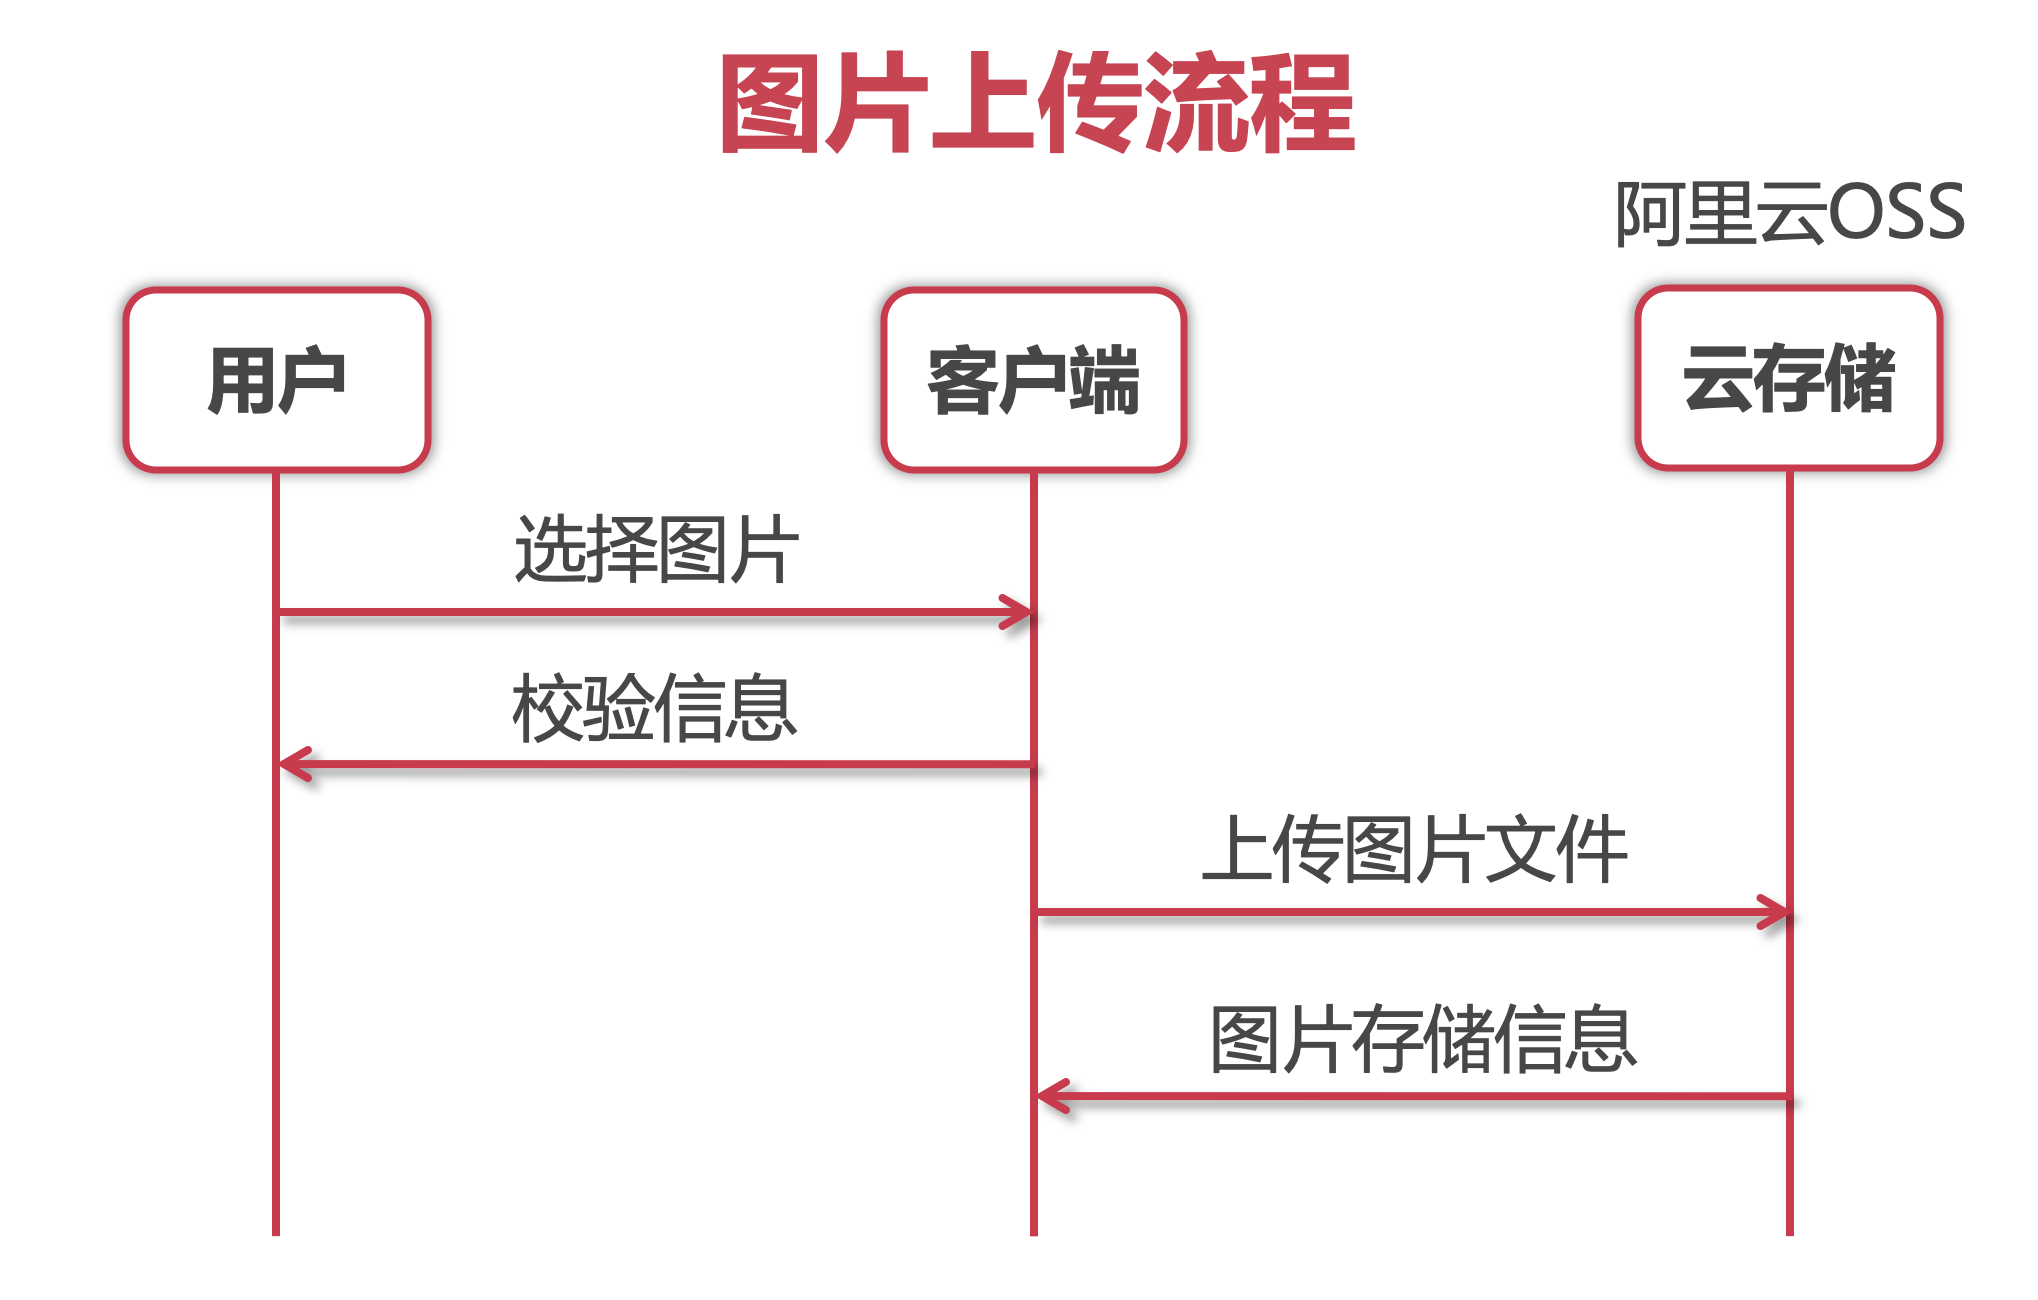
在views文件夹中创建Upload.vue文件。
安装ali-oss:
npm i ali-oss --save
<template>
<div>
<label for="upload" class="choose-img" :class="{upLoading: isUploading}">选择图片上传</label>
<input type="file" multiple id="upload"
style="display: none;" accept="image/*"
@change="onChange" ref="file" :disabled="isUploading"
>
<p class="tip">提示:一次可选择多张图片,最多不超过9张(单张图片大小 < 1M)</p>
<ul class="img-container">
<li v-for="(item, index) in imgList" :key="index"
:style="{background: `url(${item}) no-repeat center/contain` }"
></li>
</ul>
</div>
</template>
<script>
import OSS from 'ali-oss'
const ACCESSKEY = {
ID: '请填写自己的accessKeyId',
SECRET: '请填写自己的accessKeySecret'
}
export default {
data () {
return {
client: new OSS({
region: 'oss-cn-beijing',
bucket: 'imooc-es',
accessKeyId: ACCESSKEY.ID,
accessKeySecret: ACCESSKEY.SECRET
}),
imgList: [], // 存放上传完成的图片的列表
isUploading: false // 当前图片是否正在上传
}
},
methods: {
onChange () {
// 可选链
const newFiles = this.$refs?.file?.files
// 校验
if (newFiles.length > 9) {
alert('最多可以一次选择9张图片')
return false
}
const files = []
for (const file of newFiles) {
const size = file.size / 1024 / 1024 // 把单位转化成M
if (size > 1) {
alert('请选择1M以内的图片')
return false
}
files.push(file)
}
this.uploadFilesByOSS2(files)
},
// 上传多图到阿里云OSS
uploadFilesByOSS (files) {
this.isUploading = true
const uploadRequest = []
for (const file of files) {
uploadRequest.push(new Promise((resolve, reject) => {
this.client.put( `${Math.random()}-${file.name}` , file).then(res => {
// console.log(res)
// this.imgList = [...this.imgList, res.url]
resolve(res.url)
}).catch(err => {
console.log(err)
reject(err)
})
}))
}
Promise.allSettled(uploadRequest).then(res => {
console.log(res)
const imgs = []
for (const item of res) {
if (item.status === 'fulfilled') {
imgs.push(item.value)
}
}
this.imgList = imgs
this.isUploading = false
}).catch(err => {
console.log(err)
})
},
// async / await
async uploadFilesByOSS2 (files) {
this.isUploading = true
const imgs = []
for (const file of files) {
const result = await this.client.put( `${Math.random()}-${file.name}` , file)
imgs.push(result.url)
}
this.imgList = imgs
this.isUploading = false
}
}
}
</script>
<style scoped>
.choose-img {
display: block;
width: 150px;
height: 50px;
text-align: center;
line-height: 50px;
background-color: #42b983;
color: #fff;
border-radius: 5px;
cursor: pointer;
}
.tip {
color: #ccc;
}
.img-container > li{
list-style: none;
width: 150px;
height: 100px;
float: left;
margin: 0 30px 30px 0;
border: 1px solid #ccc;
}
.upLoading{
background-color: #ccc;
}
</style>
# 组件按需加载
在router/index.js中对组件实现按需加载。
const routes = [
  {
    path: '/',
    name: 'User',
    component: User
  }, {
    path: '/upload',
    name: 'Upload',
    component: () => import('../views/Upload.vue')
  }
]